Posts

Showing posts from June, 2013

Restoring a Reed Organ - Part 10: Fixing the Splinter

Image
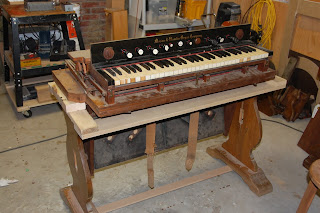
As mentioned in a previous installment, we learned the hard way that Mason and Hamlin made it difficult to separate the bellows board from the bottom of the wind chest.  They glued that sucker on, and good! I'm sure this provided an excellent seal, but many other manufacturers simply used a leather gasket and some screws (or so I'm told).  We tried as carefully as possible to remove the board, but we ended up with a signficant large splinter coming away from the windchest and several smaller ones as well.  The bottom of the chest is pictured below, with the damage. Needless to say, we were feeling a bit discouraged, and quite a bit like butchers.  I was afraid to go onto the Reed Organ discussioin page to ask for help as I thought maybe the Reed Organ police might come and confiscate this wonderful instrument from the hands of the Philistines.  I quietly emailed Rodney Jantzi, who encouraged us and gave us some advice on pushing forward.  As I said before, he is a real

Restoring a Reed Organ -- Part 9: Removing, stripping and cleaning the Bellows

Image
At this point, we needed to remove the bellows from the lower part of the wind chest.  What we did not know at the time was that while most manufactures simply screwed the bellows board to the wind chest with a couple of screws and sealed it with a leather gasket, Mason and Hamlin was in the habit of gluing the board to the chest.  I have since learned that some people are skilled enough to re-cover the bellows and exhausters while attached to the chest.  I don't think I am one of those people.  In any event, we figured we needed to separate it from the chest, so we gave it the old college try and exercised great care.   We needed to make sure we disconnected all the linkages related to the grand and the swell levers.  There were a couple of screws and a few nails.  We still didn't realize at this point that the board was glued to the chest. We worked it very carefully with a pallet knife, with some heat, and with some moisture, but it was really tough going

Restoring a Reed Organ - Part 8: Viewing the Windchest

Image
After Dad unscrewed the top portion of the windchest the pallets were revealed.  When the pitman depresses a pallet, it opens up a flow of air through the reed cell which allows the played reeds to vibrate.  Each pallet has a spring that allows it to close when the note is no longer being played.  As we were not prepared as of yet to strip down the top of the reed pan nor remove the pallets and springs, we used the existing screw holes to attach four 2x4 legs, so that we could rest the top reed pan without worring about damaging anything either on the top or the bottom.     Here is a close up of the patent label for the self-adjusting valves.   This is a close-up of the pallets and srpings for the sub bass.  The whole wind chest looks really clean and fresh.  There are only a couple of springs that are looking a little oxidized.   A couple of more views of the pallets.   This is the bottom of the wind chest.  It was clearly done in two pieces and conn

Restoring a Reed Organ -- Part 7: Investigating the Action

Image
When last we left off (last summer!) we had taken the action out of the case.  In truth, we got a bit further than this last summer, but I did not get around to posting our further progress. In July, I had order Jim Tyler's "Aunt Maude Revisted" CD which details how to restore a reed organ, with literally hundreds of photos and directions.  This did not arrive until the end of the summer, so we opted not to begin any restoration work until we had thoroughly reviewed it, which we have now done. We spent the rest of the summer investigating how the action works, taking it apart and carefully photographing everything we did for reference.  We then completely dismantled the case and stripped it. I realize some purists will be having a fit as they read this thinking about the antique patina that we removed, but the original shellac was seriously damaged in many places, and flaking very badly.  There was also some water damage.  We felt stripping and re-shellacing would be our

"She has wet my feet with her tears..." A Homily for Proper 11, Year C, 2013

Homily for Proper 11, Year C, 2013 Sunday, June 16 th , 2013 Trinity Anglican Church, Bradford, ON The Rev. Daniel F. Graves Text: Luke 7:36-8:3 “She has wet my feet with her tears…” --Luke 7:44 Have you ever found yourself wanting to be close to someone important, or someone well-known, or well-connected because of the benefits that might accrue to you through close association with that person?   Or perhaps found yourself wanting to be close to someone especially charismatic and colourful because maybe, just maybe, some of the excitement of their life might spill over into the apparent drudgery of our daily lives?   This might just have been what Simon the Pharisee was thinking when he invited Jesus into his house. Perhaps Simon thought that having this famous preacher and miracle-worker at his table might just bring him up in the estimation of his neighbours; or maybe Jesus might just do some special parlour trick and bring some wonder and amazement into th