Restoring a Reed Organ - Part V: Beginning the Disassmebly
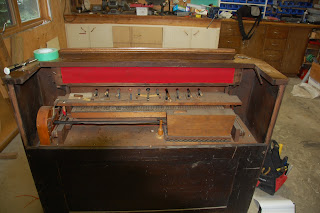
It's time to take the back of the case off and get a better look inside:
As we began to look inside, we were very pleased to see no immediate evidence of mice. Certainly there were some webs and a bit of evidence of a few other insects. Much of the felt in many places has given way to the moths, but things look very good... just dirty.
Removing the lower part of the back of the case we can see the back of the reservoir and note that the hinges are on the outside of the resevoir (some reed organs have hinges inside).


The safety/spill valve has been permanently covered over with a block of plywood, attached with screws (and as we later learned, glue). Perhaps someone thought sealing this up might have been the solution to a leaky bellows.
Taking a look at the back board of the reservoir, we can see that the bellows have have been re-covered. The top covering looks like the original rubberized cloth (with some heat damage, probably from the previous removal of the rest of the cloth). Along the sides is a "newer" cloth, which does not appear to be rubberized, but is rather almost like a canvas or denim. Certainly note original. You can see LOTS (!) of tacks affixing the cloth. Not regulation procedure according to Jim Tyler!

Did you see the interesting chalked mark on the case in upper left picture? More on that in a future post! As we look above at the upper action, we found an interesting marking on the back of the keyboard frame:
Let's flip it over and get a better look:
It says "B.M. Woodman, Feb 19th, 1876"
So, we have a date for the organ, which fall into the range I postulated in an earlier post. Still no serial number, though.
Here's a photo that we took later of the action board, after we removed it, and we noticed that Woodman had signed it there, as well.
Next: Taking the action out of the case.


Comments